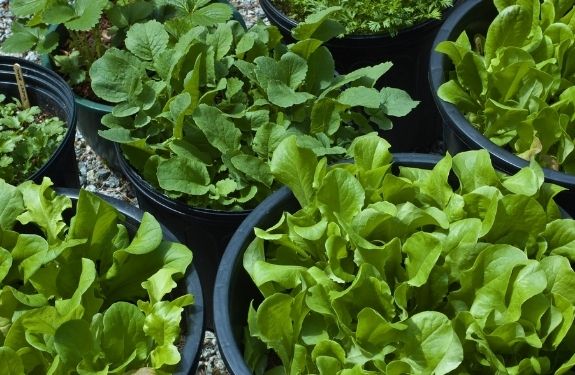
Not everyone has access to plantable land, so container gardening is a great way to enjoy fresh, healthy produce all summer long! Growing produce in pots is perfect for where I’m currently at in life. It’s more manageable since there’s hardly any need to pull weeds and there’s no need to till the land. The only maintenance is regular watering!
Not only does a container garden save space, it saves money as well. Something that is important with the cost of food forever increasing!
While I’m not an expert, there are some tips I’ve learned that I’d love to share, to help you get started container gardening.
Start small
The first year I decided to try my hand at container gardening, I went a bit crazy. Rather than trying out a couple of different plants, I decided to try almost every plant that claimed to be for small spaces. As the summer went on, I lost my enthusiasm and most of the plants ended up being neglected. I’ve since learned to assess where I’m at in life to determine just how much time I’ll have to maintain my garden, which helps me decide how many plants/seeds to buy.
Buy your seeds and plants
Container or urban gardening is becoming quite popular these days. It’s quite easy to find plant and seed varieties that are produced especially for growing in compact situations. In fact, I picked up a couple of different seeds that were from an “Urban Garden Collection” line of seeds by Thompson & Morgan. Did you know, Amazon also sells seeds?
Don’t think you have to spend a lot of money to build up a container collection. In fact, I got all my pots (black 5 gallon buckets that trees or big shrubs come in) from the golf course that I used to work at. I didn’t pay a cent! While this is not an option for most of you, many greenhouses sell 5 gallon tree buckets at an affordable price. You could also keep your eyes open on sites like Kijiji, Craigslist or Facebook Marketplace for any suitable container. There’s no need to break the bank, especially when you’re just getting started container gardening.
In choosing the size of your pots, take a look at the packages or labels on the plants that you have purchased. If they’re especially meant for containers, the packages or labels will usually tell you if you need a big pot or if a small one will suffice. Tomatoes, beans, peas, carrots, potatoes, and peppers generally need large containers, while lettuce, radishes, herbs, and onions are suitable for shallower containers.
Find the light
When determining where to put your containers, sunlight is a very important thing to factor in. Most vegetables need a lot of sunlight so I placed most of my containers on our back patio where they get all the afternoon sun. I put my lettuce containers in the front where the morning sun only hits for a couple of hours; lettuce doesn’t like to get too hot. Your seed packs and plant labels will tell you how much sun each plant prefers.
Buy good potting soil
Once your containers are in place, you’ll want to fill them with a good quality potting soil. Not top soil and not regular garden soil. Potting soil is always modified to ensure proper drainage and aeration which is important to the health of your plants.
Filling large containers can be costly. To reduce the cost and also the weight of the container consider adding a filler to the bottom of the container to take up space. Crushed pop cans, plastic milk jugs, packing peanuts and even those empty black/green plastic flower pots you just used are all great options.
Plant, Water, Wait
Finally, it’s time to plant your seeds or starter plants! Plant each fruit and vegetable according to the directions found on the label or packaging. Water everything well. (You may want to use a spray bottle for little seeds, like lettuce, so they don’t get washed away.) Now, sit back and watch for everything to start growing!
I hope these easy tips will help you gain confidence to get started container gardening! Have you ever done any container gardening? What will you be planting this year?
You might be itching to get your garden going, but chances are the outdoor sowing season is still a few weeks away. Well no worries, you can start your seeds indoors several weeks before the final frost of the season!
By starting your seeds indoors, you can get a jump on the growing season while saving some money in the process. Here is what you need to know to start seeds indoors.
First, let’s take a look at what you will need:
Seed starters (you can use anything: yogurt cups, egg carton cups, egg shells, K-cups…etc.)
I’ve linked to some items on Amazon for convenience, but you can gather supplies from anywhere to fit your budget.
A good rule of thumb for when to start your seeds is 4 weeks before the last frost of the season. This will vary depending where you live, so consult The Farmer’s Almanac to find out when the perfect planting time is for you.
DIRECTIONS:
Begin by placing the seed starter cups on the cookie sheet or tray. This way, the surface under the cups is protected and you can easily move them if you need to. Also, make sure the containers you choose have drainage holes.
Fill each cup 3/4 of the way full with nutrient rich potting soil. Seedlings need a light, airy soil mix that drains well. You can buy a seed starting mix at a garden center or make your own by mixing equal parts peat moss, vermiculite, and perlite.
Plant the seeds: Follow the instructions on the seed packet for planting depth and spacing. In general, plant the seeds twice as deep as their diameter.
Cover the seeds with soil and mist the area with your spray bottle. Misting is easier and cleaner than a watering can, plus it will keep you from over watering.
Use the wood craft sticks and marker to make plant markers for the seedlings so you know what they are once they start growing.
Pull a sheet of plastic wrap over the top of the seed starters. This will allow light in but will help the plants retain heat. NOTE: You will need to remove the plastic wrap every few days to mist the soil to keep it moist. Just be sure to return the plastic when you are done.
Place your seed starters in a window where they will get at least 6 hours of sun per day. If you don’t have an area where this is possible, a sun lamp will work.
As soon as you see sprouting, remove the plastic wrap. Continue to water every few days and keep the soil moist at all times.
In just a few weeks, your seeds will be seedlings and soon they will be ready to get transplanted outside. Be sure the threat of frost has passed and you follow package directions when transplanting.
See how simple starting seeds indoors can be? Give these tips a try and get a jump on the growing season now!
Growing up, my mom would plant a big vegetable garden every year so the idea of growing my own food has always been appealing. Due to our lack of yard space, I have tried a bit of container gardening in the past, but this year, I intend on going “all out” and documenting my progress!
Although I won’t be able to grow enough vegetables to last all summer long, it’s still nice to know exactly where they come from and to have the satisfaction of eating what I grow. Nothing beats watching your hard work come to fruition!
When it comes to container gardening, not all fruits and vegetables will successfully grow in containers. From my experience and online research, here are the best vegetables for container gardening.
Lettuce
Spinach
Carrots
Radishes
Beans
Peas
Tomatoes
Peppers
Onions
Eggplant
Herbs
Strawberries
Potatoes
When you’re purchasing your seeds or starter plants, you’ll want to look for varieties that say they’re good for containers. I always have great success with patio tomatoes and Spring Mix type lettuce.
Will you be planting a container garden this year? What have you had success with in the past?
It’s that time of year again when the grass is green, flowers are nearly blooming and people are starting to think about or prepare their gardens. It can be tough for some who wish to plant, but feel they don’t have the room or ability to plant anything where they currently live.
Here are 5 Ways To Grow A Garden In Small Spaces that will help anyone, no matter the size of their living space or yard, to be able to grow some type of garden that will supplement their groceries as well as bring the joy of watching a garden grow.
Create Window Boxes
Using ready made window boxes is a great way to go when trying to garden in tight spaces. There are many to choose from or you can create your own with a long narrow basket lined with plastic. (Make sure to poke a few small holes in the plastic to allow for drainage.) Windows are great for the sunlight plants need while using space that is otherwise typically empty in your home.
Container Gardens
Whether you use traditional pots or the empty containers and baskets you have around the house container gardens are an excellent way to grow vegetables in a small space.
Herbs and tall plants do best in container gardens as they can grow up instead of out. Tomatoes, Peas, Green Beans and Corn are all great for containers, just make sure you also have plenty of room for them to grow upward and proper support to hold them up.
Hanging baskets or a great way to grow vegetables that tend to create longer vines. Cucumbers, Squash and Zucchini grow nicely in hanging baskets as long as you don’t crowd too many in one basket.
Repurpose regular baskets with some plastic sheeting in the bottom and some small chain woven through the sides to create a “hanger”. Make sure to invest in sturdy material so you don’t wake up to a basket of vegetables and soil all over your floor.
Turn a Flower Bed into a Vegetable Garden
Sure we love the tulips, lilies and roses around the front of the house, but would it be better for you to use that space for vegetables instead? You can also leave the bulk of your flowers in place and grow only a few vegetables in between. Weeding back what you currently grow as flowers and filling in empty space with herbs, lettuce, cucumber, squash and more will help to create food and beauty at the same time.
Use a Trellis on the Side of Your House
Many vegetables actually grow on vines that will easily trail upwards on a trellisif trained. Planting in the ground beneath or in a sufficient container beneath a trellis and training the vines for peas, green beans, and more to grow up the trellis is a great way to use otherwise wasted space. It also creates a bright visual attraction for your home.
Just because you live in a small space doesn’t mean you can’t easily grow a garden to help supplement your grocery budget.
These 5 ways to grow a garden in small spaces are just the beginning of many ideas available for creating small gardens in any space. Thinking outside the box is the best way to go when trying to create great gardens in a small home or small yard.
A beautiful herb garden is a great addition to your home but can be difficult if pests find your garden a good home to live in. With a little planning and maintenance, you can protect your garden and help it thrive. Here are 5 tips to help you out.
Use Strong Smelling Herbs
Take advantage of plants that repel pests for your herb garden. Planting pungent herbs like mints along with other herbs will help reduce the number of pests you have to deal with. Herbs like catnip are great for repelling ants, weevils, squash bugs, aphids, and Beatles.
Use Flowering Herbs
A great way to deal with pests in your herb garden is to plant herbs that will attract beneficial insects. Flowering herbs like lavender, basil and dill are a great way to attract butterflies and bees that will help pollinate your garden and make your plants stronger.
Use a Bug House
Place a bug house in your herb garden to attract insects like parasitic wasps that will deal with leafminers and hornworms and ladybugs that will help protect your garden from aphids. A bug house is an easy way to encourage beneficial bugs to come to your garden and stay to protect it from pests.
Use Salt
Snails and slugs can be a common issue in herb gardens. A line of salt along the garden bed edging is a great way to keep them out of your garden. Slugs and snails will back up and go the other way if they touch the salt instead of venturing into your garden beds and pots.
Use a Soap Solution
If aphids take over your garden you can save your herbs by spraying them with a safe and effective soap solution. A teaspoon of dawn dish detergent or liquid Castile soap in a spray bottle with water can help kill aphids when they take over your herb garden. Spray this solution on your plants getting the undersides of leaves in the evening so it has plenty of time to dry before the sun beats down on your plants.
With these tips, make your herb garden a great addition to your home garden. Besides fresh herbs are the best for cooking with!